The richness and clarity that modern-day camera sensors can produce is just astounding. But while sensor technology has come on in leaps and bounds, codecs and their myriad compression techniques have remained mostly unchanged. Of course it’s exciting to see so many cameras on the market with ultra high resolution, jaw dropping latitude or super high frame rates, but where’s all that data going? What’s happening to it before it lands in your digital lap? Should you even care? Well, I think the answer to that last question is an emphatic yes and, in this article, I will show you how a little knowledge about the inner workings of your camera will improve your imagery.
How Camera Sensors Work
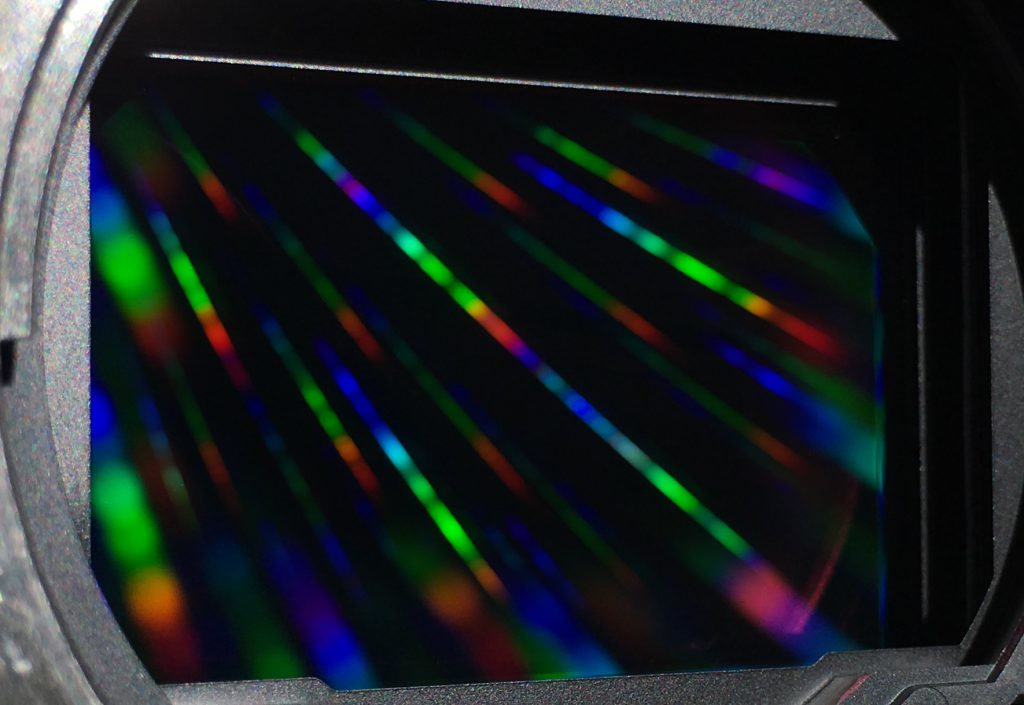
Camera sensors are like tiny little photovoltaic cells, in as much as, when they are struck by photons of light, they generate a small electrical charge. The higher the charge, the more photons must have hit that particular part of the sensor, or photosite, and therefore the brighter the scene must have been. This is how the camera is able to construct a black and white image based on the intensity of the light in your scene.

So Where Does Colour Come In?
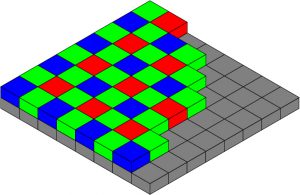
In 1976, a scientist named Bryce Bayer invented the Colour Filter Array, which allows digital sensors and their tiny photosites to “see” colours. His approach was very much lead by the way the human visual system works. In order to mimic the way three different types of cone cells sample light entering our eyes, he created a mosaic patterned filter that covered each photosite and allowed only short (blue), medium (green) or long (red) wavelengths of light to make it through. As such, the camera now has the same voltage derived luminance values as before but this time they are for specific frequencies of the spectrum. In order to accommodate the increased sensitivity humans have to green light and the spike in medium wavelength frequencies the sun gives out, there are twice as many photosites covered in green filters as red and blue.

The Sky Isn’t Falling
As a side-note, one of the reasons we are so sensitive to green is because we need to see more shades of green than any other hue. By seeing more shades of greens, we become able to detect changes in contrast in that zone more easily and changes in contrast are how we perceive movement. That is a biological imperative for a mammal that has spent most of its existence hunting (or being hunted) in forests. In other words, if something moves in the bushes/trees, we are more likely to catch it or run away from it! Conversely, we are massively in-sensitive to blue light, as blue is the rarest colour in nature and, as such, our lives do not depend so much on detecting it. For those of you now thinking, ‘what about the sky’ – last time I checked, the sky couldn’t be eaten, and can’t eat us! You may be surprised to learn that only 2% of our cone cells are the short wavelength (blue) type! The important thing is that colour values are generated by the sensor and that resulting raw data is then de-bayered, using algorithms of varying complexity, to infer what the scene must have actually looked like.

A Path Of Destruction
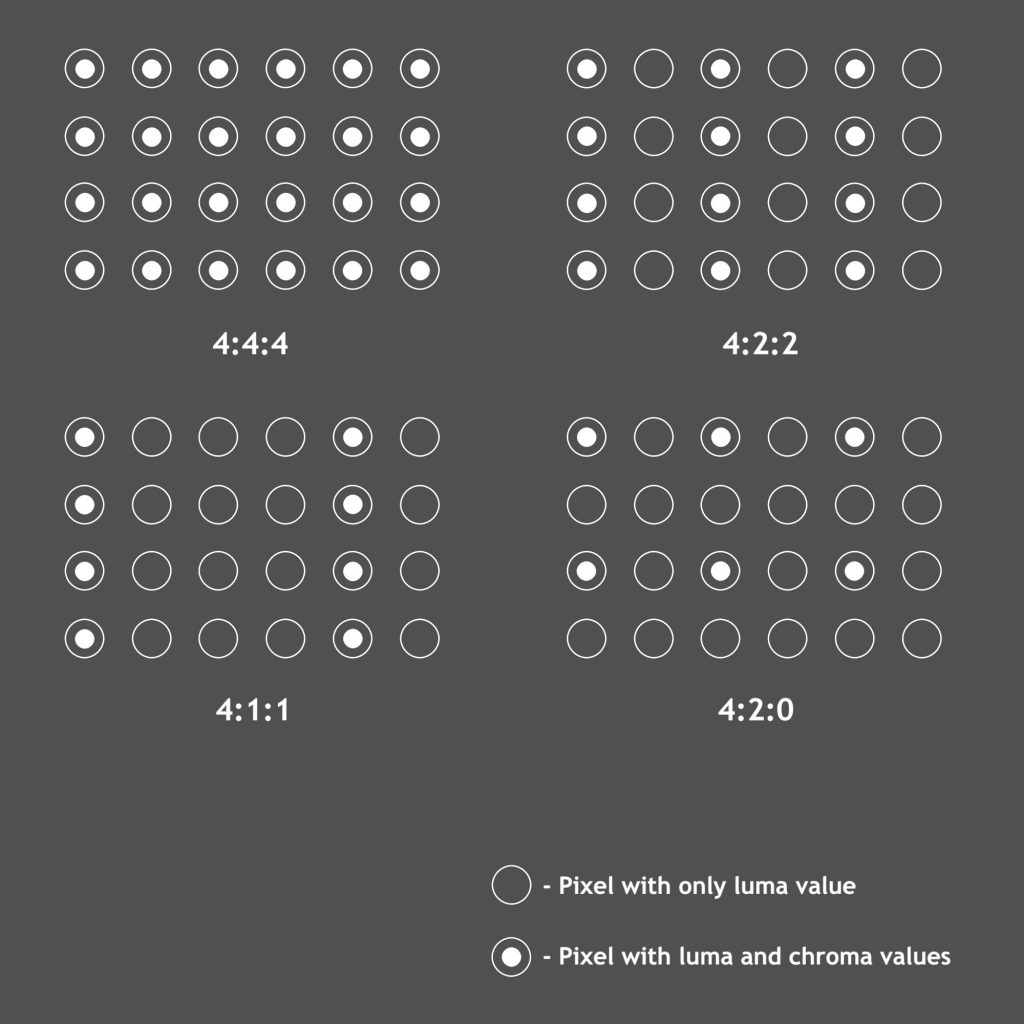
If you are shooting raw (r3d for example) then you have the full range of the recorded data available to you in post but, if you’re not, it is highly likely that there will now begin several destructive steps performed by the camera’s processor, to curtail the signal and make it easier to playback. Chroma Subsampling is one such step, in which either 50% or 75% of the colour information is stripped out and replaced by replicated colour information from its neighbours. Where 50% of the colour information is thrown away, every other pixel’s colour information is removed, so in a 4 x 2 pixel sample, only 2 pixels keep their colour information in the top and bottom rows. In the case of a 75% reduction, we would keep 2 on the top row and 0 in the bottom row. It is this pattern that gives us the identifiers, 4:4:4 (full RGB), 4:2:2 (half) and 4:2:0 (quarter*). Quantising is another round of compression that will be performed. This spatial compression essentially breaks the data down in to small (normally 8×8) groups of pixels (macroblocks) and then averages their colour and luminance values, saving a lot of space in the file. Add to this mix the fact that, if you are using an 8-bit codec (XAVCS, AVCHD, XDCAM EX to name a few), you’re also fighting against having a limited amount of data to begin with (only a total of 16.78 million colours). As the purpose of this article is to talk about colour fidelity, I will set aside temporal compression, as this process, while considerably shrinking down our files for playback, does not compress the colour information any further.
*This is a simplification of 4:2:0 but broadly gets the point across.

Time For the Good News
So, is the solution just to shoot raw all the time? Not necessarily – the massive file sizes and processing power it takes can be prohibitive for many filmmakers, so click through to the second part of this article, where I will focus on what you can do to capture the cleanest signal possible and make the most of it once you start to grade.

This is such a useful article.
Thank you very much for explaining this.
Thanks George!