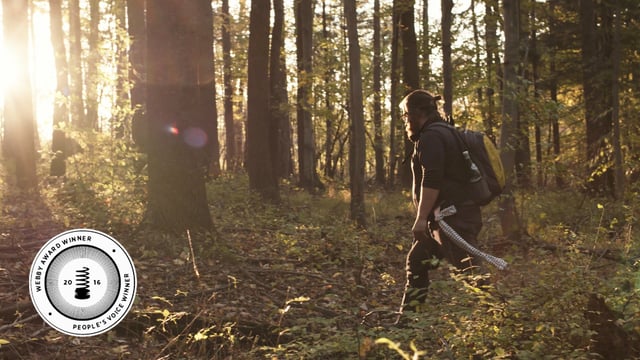
Gab Tarabously is the cinematic mind behind Delicious Cinema, a production company that highlights the world of food and the people who passionately dedicate their lives to feeding others. His ‘Culinary Filmmaking’ projects have been nominated for a James Beard Award, and his most recent collection of stories, ‘Heritage’, won the 2016 Webby Award for Best Documentary.
Check out his insights below on his filming and editing process.
Gab Taraboulsy interview – Delicious Cinema
How did you get into filmmaking and your current role?
I grew up in Montreal and moved to NYC to attend Grad Film School at Columbia University. I was probably the only person in my class who didn’t have the aspiration of becoming a feature filmmaker. I had grown up in documentary, fell madly in love with the medium, and wanted the academic rigor of learning visual storytelling and the principles of drama. After graduating, I moved to LA and spent two horrible years trying to get someone to notice I exist. It never happened.
Out of desperation, I started one-man-banding my own short culinary documentaries and putting them up on my Vimeo channel, @DeliciousCinema. The hit counter barely cracked the triple digits, but somehow – cosmically – someone at Google had seen them just as YouTube was launching their Premium Channel initiative. They connected me with the production company running their “Tasted” channel and within two weeks of upload, I was doing this professionally.
Through what I imagine is a string of clerical errors, I’ve managed to continue working in this incredible world of culinary cinema. I’m currently Producing/Directing original series at Tastemade, where my series have been nominated for a James Beard Award – and subsequently sold to the Cooking Channel (“Grill Iron”) and most recently won a Webby for Best Documentary Series of 2015 (“Heritage”).
How did you find out about FilmConvert?
I scour camera and tech sites all day looking for things to early adopt. Anything that can give a creative or stylistic advantage. When NoFilmSchool and Philip Bloom gushed about a new color correction plugin that had instantly made its way into their workflows, I jumped on a trial version. The interface was the perfect match of pleasing form and intuitive function. FilmConvert was the first time I actually liked the footage that came out of my Canon C100. I couldn’t believe how far down the field I could take LOG footage with a few simple clicks.
Why did you decide to use FilmConvert for this particular project?
We knew going into pre-production that our “Heritage” pipeline would culminate in FilmConvert. Our turnaround time is bananas and our entire post production team consists of a single person (Alex Emanuele, our amazing editor). We don’t have the luxury of sending our cut to a post house and having each shot power-windowed. I would lament that fact far more if I didn’t have such confidence in what we could pull off right out of Premiere.
Alex will send me our final project file and I’ll start dialing in the look with FilmConvert (oftentimes from my laptop while still on the road). I’ll spend hours toggling between different film stocks and ramping the ‘Film Color’ and ‘Curve’ sliders up and down until I feel like I have it just right for that particular story.
It’s one of my favorite parts of the process. I particularly like the results because they don’t make LOG merely look like an approximation of REC709; the film curve introduced with FilmConvert is absolutely unique and aesthetically fascinating.
What was the particular look or style you were going for with your video?
More than anything, we wanted our visual look and style to convey the emotion of the incredible places and people we were visiting. We did many things in-camera to inflect the passion of the chefs and farmers and the purity of their ingredients: high-frame rate photography, magic hour-only shooting, elegant jib movements. Many of our stories were predicated on nostalgia and the Chefs’ memories of the way things were done in bygone eras.
I loved that FilmConvert instantly put you into nostalgic film emulations (Fuji Astia/Provia; Kodak Tri-X 400; Polaroid). The connections we have with these stocks are visceral; they evoke cherished feelings and memories. I was hoping that, if adjusted correctly, it would feel like our contemporary stories shared a link with the past.
What settings, film stock, camera profiles and tweaks did you use in FilmConvert?
We shot in 4K on a Sony FS-7 in SLOG-3 SGamut3 Cine. Each episode was treated differently. A family foraging in Cleveland, Ohio was a world apart from a Chef working in solitude on fogged-over Orcas Island in the Pacific Northwest.
Ultimately, we wanted to use post color to allow you to feel what it was like to be there. Our baseline was to use KD 5213 Vis 3 because I love what it did with the shadow/highlight curve (set it in a perfect place by default) and it didn’t introduce too much saturation. I’d then bring in a hint of blue into the shadows and use the overall temperature slider to warm up an image, especially our exteriors.
As much as possible, I’d try and keep the entire correction within FilmConvert, even trusting the native slider for Exposure settings – I thought it all worked amazingly well. At most, I’d add the ‘Curves’ filter to a vignette on a custom tracker to draw the eye towards certain people or objects.
I distinctly remember… every time I’d go from lifeless S-LOG to FilmConvert, my will to live would be magically restored. Our story suddenly lit up with energy and breath and emotion.
